How to Remove and Replace a Toilet
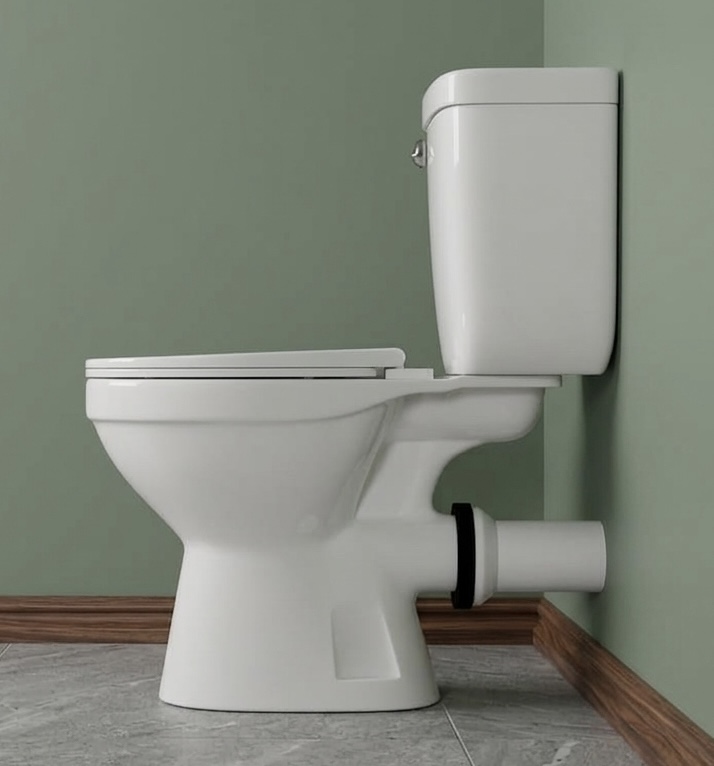
Replacing a toilet isn't as daunting as it sounds. A close-coupled toilet (the standard type where the cistern sits directly on the bowl) is essentially held down by two screws, connected to the waste pipe at the back, and fed by a single water supply. If you can undo a few bolts and aren't squeamish, you can do this in a couple of hours.
Tools and Materials
What you'll need
- Adjustable spanner
- Screwdriver (flat-head and Phillips)
- Drill with masonry and wood bits (for floor fixings)
- Tape measure and pencil
- Spirit level
- Towels and a bucket
- Rubber gloves
- Silicone sealant (clear or white)
- Flexible waste connector (multiquick) — if the old rigid waste pipe doesn't suit the new toilet
- Flexible tap connector for the water supply
- An isolation valve (15mm) — if there isn't one already
Isolate the Water and Empty the Toilet
Turn off the water supply to the toilet. If there's an isolation valve on the feed pipe (usually a small valve with a slotted screw near the bottom of the cistern), turn it off with a flat-head screwdriver. If there's no isolation valve, you'll need to turn off the mains at the stopcock.
Flush the toilet to empty the cistern. If the water is properly isolated, the cistern won't refill. There will still be about an inch of water sitting in the bottom of the cistern below the flush valve — this needs to come out before you disconnect anything.
Getting the last of the water out
The easiest method: put an old towel in the cistern, let it soak up the water, wring it out into a bucket, and repeat. Do the same with the toilet bowl. It's not glamorous, but it prevents water going everywhere when you lift things off. Wear rubber gloves for the bowl — you'll feel better about the whole experience.
Disconnect the Water Supply
The water supply to the cistern is usually a flexible connector at the bottom or side of the cistern. Use an adjustable spanner to undo the nut. Have a towel underneath — there may be a small amount of water still sitting in the fill valve above the connection point. Once it's undone, push the pipe aside.
Remove the Cistern
A close-coupled cistern is held to the wall by two screws (usually through the back panel) and to the toilet bowl by two bolts that pass down through the cistern base into the bowl shelf.
- Remove the two wall screws first. They're usually behind plastic caps.
- Reach underneath the cistern (behind the bowl) and find the two wing nuts. Undo them by hand or with a spanner. There will be washers — keep them, you'll need them for the new toilet.
- Lift the cistern straight up and off the bowl. It's heavier than it looks because of the ceramic — get a good grip and set it down somewhere safe.
Remove the Toilet Bowl
The bowl is held to the floor by two screws (or bolts with decorative caps) and usually has a bead of silicone around the base.
- Remove the screw caps and unscrew both floor fixings.
- Cut through the silicone around the base with a Stanley knife. You don't need to remove it all — just break the seal so the bowl can lift.
- Gently ease the bowl away from the waste pipe at the back. If you're lucky and the waste has a flexible connector (multiquick), it just pulls off. If it's a rigid soil pipe, you may need to rock the bowl gently to break the seal.
- Lift the bowl straight up and carry it out. Toilets are surprisingly heavy, and you're carrying a load of wet ceramic with residual waste inside — use both hands and keep it level.
Block the soil pipe
The second the bowl comes off, you've got an open 110mm waste pipe in the floor. Stuff a wad of newspaper or a rag into it immediately. This stops sewer gas coming into the room and prevents debris falling in while you're working. Just don't forget to remove it before fitting the new toilet.
Prepare the Area
With the old toilet out, clean the floor. Scrape off any old silicone, remove the old floor fixings, and fill any large screw holes if they don't line up with the new toilet. If the floor is being retiled, now is the time — the toilet goes back on top of the finished floor.
Check the waste pipe position. The new toilet's outlet needs to line up with the existing soil pipe. If they don't align perfectly, a flexible waste connector (multiquick or similar) takes up the difference. These are cheap, easy to fit, and much more forgiving than rigid pipework. If you don't already have one, pick one up — it'll save you an hour of fiddling with rigid pipe angles.
Fit the New Toilet Bowl
Every toilet is slightly different in how it fixes to the floor. The two most common methods:
- Screw-through holes in the base of the bowl — you drill through the floor and screw straight down through the porcelain. Use the plastic washers provided to protect the ceramic.
- L-shaped side brackets — these screw to the floor first, then the toilet slides onto them and is secured with side screws. More fiddly to position, but looks neater.
For L-shaped brackets
- Position the toilet exactly where you want it — pushed back to the wall, centred, waste aligned.
- Mark the bracket hole positions on the floor with a pencil.
- Move the toilet aside. Measure the distance between the two bracket holes to double-check your marks are symmetrical.
- Drill, plug, and screw the brackets to the floor.
- Run a bead of silicone around the inside of the waste connector before pushing it on — this ensures a watertight seal.
- Lower the toilet onto the brackets and connect the waste pipe at the back.
- Secure with the bracket screws and clip on the decorative caps.
For screw-through fixings
- Position the toilet, mark through the holes, move it, drill and plug the floor, then screw down through the ceramic using the plastic washers to protect it.
- Don't overtighten — ceramic cracks. Firm and snug is enough.
Fit the Cistern
The cistern connects to the bowl through a flush seal — a large rubber doughnut that sits between the cistern outlet and the bowl inlet. This is what stops water pouring out the back every time you flush.
- Check the flush seal is seated properly on the underside of the cistern (it usually comes pre-fitted).
- The two cistern bolts slot into holes in the base of the cistern. Thread them in from inside the cistern — they usually have a square shoulder that locks into a slot so they don't spin.
- Lower the cistern onto the bowl shelf, lining up the bolts with the two holes in the bowl.
- From underneath, slide a washer onto each bolt, then hand-tighten the wing nuts. Alternate between the two, tightening evenly, until the cistern is firm and level. Don't overtighten — you're compressing the flush seal, not trying to fuse the ceramic together.
- Screw the cistern to the wall using the two back screws with protective washers. These are steadying screws, not structural — they just stop the cistern wobbling. Light pressure is enough.
Run a bead of silicone behind the cistern
Before screwing to the wall, put a blob of silicone between the cistern and the wall. This packs out any gap and stabilises the cistern so it doesn't rock. It also prevents the cistern from cracking against the wall if someone leans back on it.
Connect the Water Supply
The fill valve on the new cistern will have a threaded connection at the bottom (or side, depending on the model). Connect this to your water supply pipe using a flexible tap connector.
If there's no isolation valve on the supply pipe, now is the perfect time to fit one. Cut into the pipe, fit a 15mm isolation valve with compression fittings, and run a flexible connector from the valve to the cistern. This means next time you need to work on the toilet, you can isolate it without turning off the water to the whole house.
Turn the water supply back on slowly. Let the cistern fill. Check for leaks at every connection — the fill valve, the flex connector, and the isolation valve. Flush the toilet and check underneath the cistern for any drips from the flush seal. If the flush seal is leaking, the cistern bolts need tightening slightly — evenly, a quarter-turn at a time.
Seal Around the Base
Once everything is connected and leak-free, run a bead of clear or white silicone around the base of the toilet where it meets the floor. This stops water from mopping or splashes getting underneath the bowl, where it would sit and go stale.
Leave a gap at the back
Some plumbers leave a small gap in the silicone at the back of the toilet (where it meets the wall). The reason: if the flush seal or a connection ever develops a slow leak, water will escape at the back where you can see it, rather than being trapped under a fully sealed base where it rots the floor without you knowing. It's a judgment call — sealed all the way around looks neater, but a gap at the back is more practical.
Let the silicone cure for 24 hours before using the toilet normally. Flush it a few times to check everything works, then leave it alone to set.