How to Solder Yorkshire Fittings: Beginner’s Guide
Yorkshire fittings (also called solder ring fittings) are the easiest way to get into soldering copper pipe. They have a ring of solder built into the fitting, so you don’t need to feed solder by hand — just heat the joint until the ring melts and you’ll see a perfect bead of solder appear around the edge. If you can operate a blowtorch and prepare a pipe, you can do this.
Yorkshire vs End-Feed — What’s the Difference?
Both types create the same end result: a permanent, watertight soldered joint on copper pipe. The difference is in the method:
- Yorkshire (solder ring) — has a ring of solder pre-loaded inside the fitting. You just heat the joint until the ring melts. The solder flows automatically and fills the gap between the pipe and fitting through capillary action. No hand-feeding required.
- End-feed — the fitting is empty. You heat the joint, then manually touch solder wire to the edge of the fitting and feed it in. This gives more control but requires more skill to judge how much solder to add.
Yorkshire fittings cost a bit more per fitting, but for DIY work the built-in solder takes all the guesswork out of it. You can’t over-feed or under-feed — the ring is pre-measured for the fitting size. For anyone learning to solder copper, they’re the obvious starting point.
Tools and Materials
What you’ll need
- Blowtorch — a basic propane torch is fine for learning. Auto-igniting MAP gas torches are faster and hotter but cost more. Either will do the job on 15mm and 22mm pipe.
- Pipe cutter — sized for your pipe (15mm or 22mm). Gives a cleaner, squarer cut than a hacksaw.
- Deburring tool — for cleaning the inside and outside edges after cutting. Some pipe cutters have one built into the handle.
- Wire wool — for cleaning the outside of the pipe. A Scotch-Brite pad works for cleaning the inside of the fitting.
- Flux — lead-free, self-cleaning flux. Applied to the pipe and inside the fitting before assembly.
- Heatproof mat — essential when working near timber, in cupboards, or against walls.
- Cloth — for wiping off excess flux after the joint cools.
- Lighter or matches — if your torch isn’t auto-igniting.
Cutting the Pipe
Measure the length you need, accounting for the depth the pipe will sit inside each fitting (typically 15–20mm per end, depending on the fitting size).
- Place the pipe in the cutter and line up the blade with your mark.
- Tighten the cutter until the blade just bites into the copper.
- Rotate the cutter around the pipe, tightening slightly after each full rotation.
- The pipe will drop off cleanly after a few turns.
Always cut factory ends off new pipe
Even brand-new copper pipe from the merchant has a factory-cut end that’s not properly prepared. It may look fine, but it often has a slight bevel, burr, or oxidation from sitting in the rack. Cut 10mm off each end before you use it. It takes five seconds and guarantees you’re working with a clean, square edge.
Preparing the Pipe and Fitting
Preparation is where the joint is won or lost. Solder will not bond to dirty, oxidised, or greasy copper. Every surface that solder needs to touch must be clean and bright.
The pipe
- Deburr the inside. Insert the deburring tool into the cut end and rotate a few times. This removes the lip of copper that the cutter pushes inward. If you leave it, it restricts water flow and creates a snag point for debris.
- Deburr the outside. Use the other side of the deburring tool to shave any raised edge off the outside of the pipe. The pipe needs to slide smoothly into the fitting.
- Clean with wire wool. Wrap wire wool around the end of the pipe and rotate it a few times. You should see bright, shiny copper with no dull patches, fingerprints, or discolouration. Clean an area slightly longer than the insertion depth of the fitting.
The fitting
Use a Scotch-Brite pad or the flux brush to clean inside each socket of the fitting. You’re removing any manufacturing residue or oxidation from the internal surface where the solder ring will flow. The inside needs to be clean copper, not tarnished.
Don’t touch the cleaned surfaces
Once you’ve cleaned the pipe and fitting, don’t handle the prepared surfaces with bare hands. The oils from your skin will contaminate the copper and the solder won’t bond properly in those areas. Hold the pipe behind the cleaned section, and handle the fitting by the body.
Applying Flux
Flux does two jobs: it chemically cleans the copper surface as it heats up, and it helps the molten solder flow evenly around the joint by reducing surface tension. Without flux, the solder will bead up and refuse to wick into the gap.
- Apply flux to the outside of the pipe end. Use the brush to coat the prepared area evenly. You want a visible film, not a thick blob. Excessive flux will run when heated, drip onto other surfaces, and cause corrosion if not cleaned off.
- Apply flux inside the fitting. Brush a thin coat into each socket. The solder ring is already in there — you’re fluxing the copper surface around it.
- Assemble the joint. Push the pipe into the fitting until it hits the internal stop. Give it a slight twist as you push to spread the flux evenly.
Soldering the Joint
Solder all connections on a fitting at the same time
This is critical. If you’re using a straight coupler, both pipes go in before you apply heat. If you’re using a tee, all three pipes go in first. When you heat the fitting, the entire solder ring melts — if one socket is empty, the solder flows out of it and that socket won’t seal when you later try to add the missing pipe. Plan your assembly so everything is in place before the torch comes out.
- Position your heatproof mat behind the joint if there’s anything combustible nearby.
- Light the torch and adjust to a steady blue flame.
- Apply heat to the bottom of the fitting. Heat rises, so starting from below gives the most even heat distribution. The rising heat also creates upward capillary action, pulling the solder into the joint.
- Move the flame gently around the fitting. Don’t hold it in one spot — you want even heat across the whole fitting so the solder ring melts uniformly.
- Watch for the solder ring. After 15–30 seconds (depending on the pipe size and your torch), you’ll see a bright silver ring of molten solder appear around the edge of the fitting. Once that ring is visible all the way around, the joint is done. Remove the heat immediately.
That’s it. The ring of solder around the edge is your confirmation that the internal ring has melted and filled the joint completely. If you only see solder on one side, the fitting wasn’t heated evenly — apply a bit more heat to the dry side until solder appears there too.
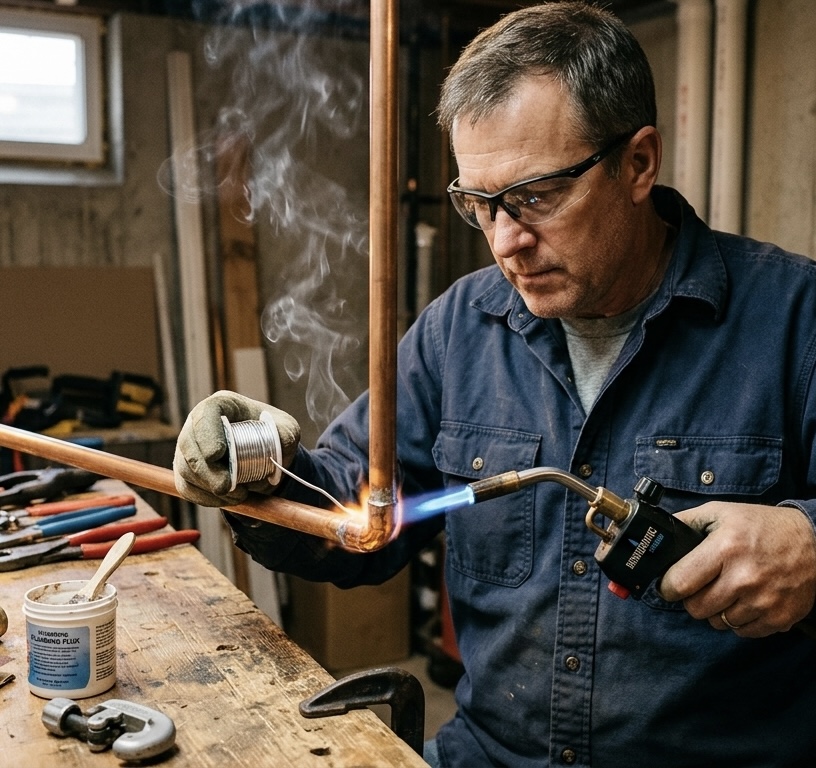
The tape measure trick
If you’re soldering a vertical joint and the bottom pipe wants to drop out under gravity (the flux makes everything slippery), stand a locked tape measure on the floor underneath the pipe to hold it at the correct height while you solder. Simple, free, and it frees up both your hands for the torch.
Cooling and Cleanup
Leave the joint to cool naturally for at least five minutes. Do not:
- Wipe or touch the joint while hot. The solder is still liquid for the first minute and semi-set for several more. Touching, wiping, or knocking it risks disturbing the solder before it’s fully solidified, creating voids that will leak.
- Quench with water. Rapid cooling causes thermal shock in the solder, leading to micro-fractures. These may not leak immediately but can fail under pressure weeks or months later.
- Clean with wire wool while still warm. Some plumbers do this for a shinier finish, but on a fresh joint it risks pulling still-soft solder out of the joint. Wait until it’s fully cool.
Once cool, wipe off the flux residue with a damp cloth. This is important — flux is acidic. Left on the pipe, it will slowly corrode the copper and leave green verdigris staining. Then give the joint a polish with wire wool to remove heat discolouration. The finished joint should look clean, with a visible ring of solder around each edge of the fitting.
Common Mistakes to Avoid
- Skipping the preparation. This is the number one cause of failed solder joints. If the pipe isn’t clean and bright, the solder won’t bond to it. You’ll see the ring appear but the joint will weep under pressure because the solder is sitting on top of oxidation rather than bonding to copper.
- Not enough flux. If the flux is patchy, the solder won’t flow evenly. You’ll get a partial ring and a partial seal. Apply a visible film to every surface.
- Heating one spot too long. Move the flame around the fitting. Concentrated heat on one spot will overheat that area (burning the flux and oxidising the copper) while the opposite side stays cold. Even heat distribution is everything.
- Trying to add a pipe after soldering. Once a fitting has been heated, the solder ring is gone. You can’t solder another pipe into an empty socket afterwards — the ring has already melted and flowed into the joints that were assembled. You’d need to treat it as an end-feed joint and add solder manually, which defeats the point of using Yorkshire fittings.
- Using old, oxidised pipe without proper cleaning. Copper oxidises over time — even pipe that’s been sitting in the garage for a few weeks will have a dull surface. Wire wool it back to bright copper before fluxing. If you’re working on pipe that’s been in service for years (common in older Cambridgeshire properties), use a cleaning flux for extra assurance. Our guide to desoldering and replacing fittings covers this in detail.
For a deeper look at what goes wrong with soldered joints and how to diagnose failures, see our guide to six soldering mistakes that cause leaks.